hardwood flooring installation methods
You’ve chosen the type of floor you want. You’ve even chosen the type of finish you want. Now, it’s time to install your new floor. But, first, you have to make one last decision. There are four hardwood floor installation methods from which to choose:
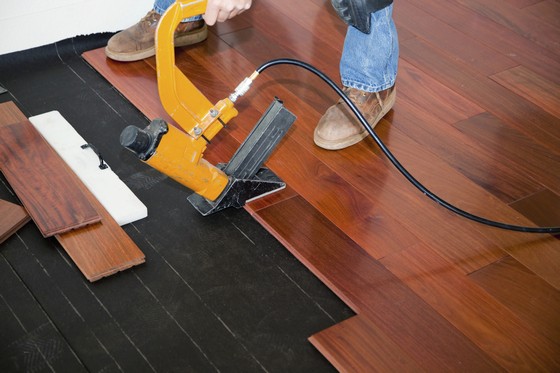
- Nail Down – Nails are used to fasten the wood to the subfloor. This method is often used with thin wood flooring.
- Staple Down – Staples are used instead of nails to attach the floor to the subfloor. This method is simpler than the nail down method.
- Glue Down – Engineered wood floors and parquets can be glued down. The wood is adhered to the subfloor with a strong adhesive.
- Floating – This is the fastest and easiest method of installation. Floating floors are not attached to any subfloor, they simply float above it. Either adhesive is applied to the boards to keep them together, or the boards are made to simply snap together. Usually a pad is placed between the wood floor and the subfloor to protect against moisture and reduce noise. Floating floors can be installed over almost any surface.
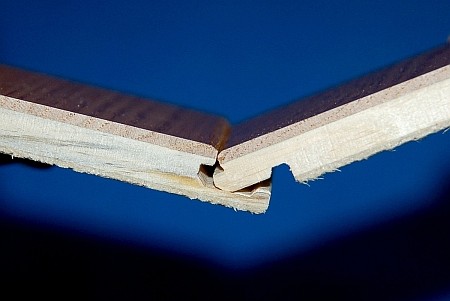
- CLICK TOGETHER
Not all engineered hardwood is tongue and groove: some clicks together! Click together installation is a floating method, so it’s not going to be attached to your subfloor. The best part about click together installation is…you guessed it…that it clicks together! Unlike floating a tongue and groove hardwood floor, click together hardwood is genuinely glue-free! This is another really great option for the weekend warrior looking to install their own hardwood floor. Click together installation may be called by different names depending on the brand of flooring you purchase, so (and I know I’m getting repetitive here…) be sure to check your instructions.